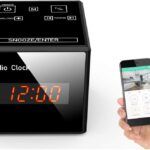


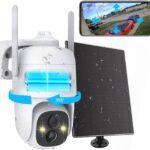
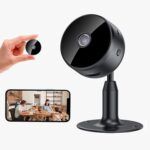


Setting up and configuring a hidden camera in AP mode typically involves a few straightforward steps. First, ensure that the camera is powered on and in access point mode, which is usually indicated by a status light or LED. Then, using your smartphone or computer, locate the Wi-Fi network generated by the hidden camera in the list of available networks.
Connect to the camera’s Wi-Fi network using the provided credentials, which are usually mentioned in the camera’s user manual or accompanying documentation. Once connected, open a web browser or the dedicated mobile app for the camera and follow the on-screen instructions to access the camera’s configuration settings.
In the camera’s configuration settings, you can customize various options such as network settings, video quality, motion detection sensitivity, and recording preferences. You may also have the option to set up notifications or remote access for viewing the live feed or recorded footage from your smartphone or computer. It’s important to carefully follow the instructions provided by the manufacturer to ensure proper setup and configuration of the camera in hotspot mode.