


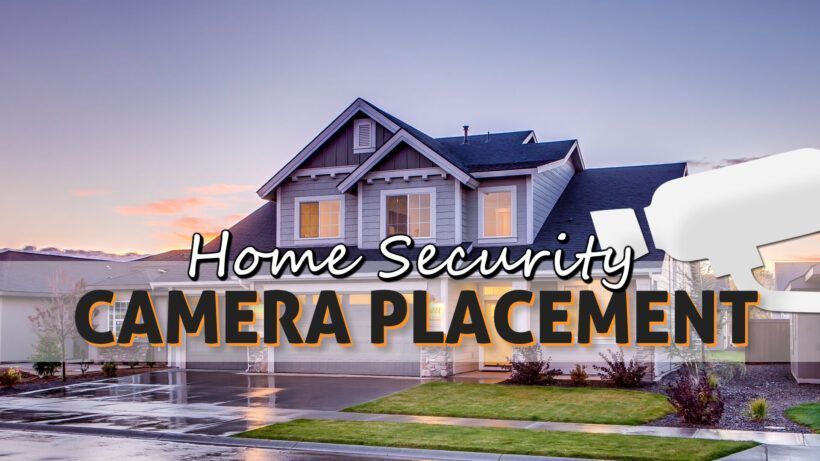
Home security is a top priority for homeowners, and one of the most effective ways to protect your property is by installing surveillance cameras. However, simply having security cameras isn’t enough; where and how you place them plays a crucial role in their effectiveness.
In our “Ultimate Guide to Home Security Camera Placement,” we’ll delve into essential tips and tricks to help you strategically position your cameras for maximum coverage.
In this comprehensive guide, we’ll cover everything from selecting the right locations for your security cameras to understanding the pros and cons of wireless and wired installations. We’ll also explore various scenarios, such as front door, backyard, garage, and interior room placements, ensuring that you have all the knowledge you need to safeguard your home effectively.
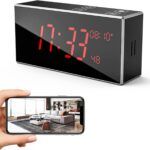
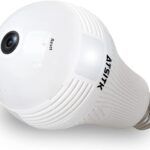
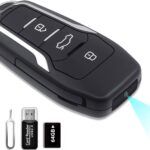
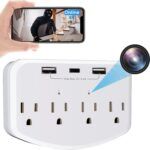
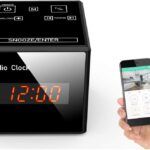
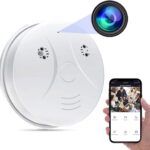
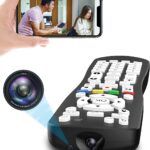
In this guide we will focus on regular home surveillance cameras, and not necessarily hidden ones. Our Hidden cameras placement page has many tips and examples specific to hidden spy cameras.
So, let’s get started with our first topic: an introduction to the importance of home security camera placement.
1. Choosing the Right Locations for Home Security Cameras
Selecting the ideal locations for your home security cameras is a crucial step in ensuring the safety of your property. In this section, we will explore the key factors to consider when deciding where to place your cameras.
First and foremost, assess the vulnerable areas of your home that require surveillance. These may include entry points like doors and windows, as well as high-traffic areas both inside and outside your property.
Consider the following factors when choosing camera locations:
- Entry Points: Front and back doors are common entry points for intruders. Placing cameras near these areas provides a clear view of anyone coming or going.
- Windows: Cameras near windows can capture potential break-ins or suspicious activity outside. Ensure they are positioned to minimize glare from sunlight.
- Yard and Perimeter: For outdoor cameras, focus on covering the entire perimeter of your property, including the backyard and garden. Position them at angles that provide a wide field of view.
- Garage and Driveway: These areas are often overlooked but can be prime locations for cameras. They can help monitor vehicles and detect any unauthorized access.
- Interior Rooms: Consider placing cameras in key interior rooms, such as the living room or home office, to keep an eye on valuable items.
- Blind Spots: Identify blind spots where intruders might avoid detection. Corner camera placement and strategic angles can help cover these areas effectively.
- Visibility vs. Discretion: Decide whether you want your cameras to be visible as a deterrent or discreet for covert monitoring.
- Night Vision Needs: Ensure that cameras in low-light areas have night vision capabilities to maintain surveillance during the dark hours.
By carefully evaluating these factors and choosing appropriate locations, you can create a comprehensive camera placement plan that enhances the security of your home.
Next, we will delve into the optimal height for surveillance cameras, a critical aspect of their effectiveness.
2. Optimal Height for Surveillance Cameras
When it comes to home security camera placement, the height at which you install your cameras can significantly impact their performance. Finding the optimal height ensures that your cameras capture the right perspective and maximize their surveillance capabilities.
Consider the following guidelines for determining the best height for your surveillance cameras:
- Eye-Level View: Mount outdoor cameras at eye level (around 6-7 feet off the ground) or higher to capture clear facial features and avoid tampering.
- Angle of View: Adjust the camera’s angle to cover the intended area while minimizing obstructions such as trees, bushes, or walls.
- Front Door Cameras: Position front door cameras slightly above eye level to monitor visitors and packages effectively.
- Backyard and Driveway: For wider outdoor areas like backyards and driveways, consider higher placements (around 9-10 feet) for an extended field of vision.
- Indoor Cameras: Mount indoor cameras on walls or ceilings at a height that provides a clear view of the room while remaining inconspicuous.
- Night Vision: Ensure that night vision cameras are positioned to avoid glare from nearby objects with reflective surfaces, as this can affect image quality.
Keep in mind that the optimal height may vary based on camera type, lens angle, and specific monitoring objectives. Experiment with camera placement and angles to find the perfect height for your surveillance needs.
Next, we’ll explore the considerations for indoor vs. outdoor camera placement, helping you make informed decisions based on your home’s security requirements.
3. Indoor vs. Outdoor Camera Placement
When it comes to home security camera placement, one of the primary decisions you’ll face is whether to install cameras indoors or outdoors. Each choice comes with its own set of considerations and advantages.
Indoor Camera Placement
Indoor cameras are typically designed for monitoring the interior of your home. Here are some key considerations for their placement:
- Entryways and High-Traffic Areas: Install indoor cameras near entry points, such as front and back doors, as well as in high-traffic areas like the living room or hallway.
- Privacy Concerns: Be mindful of privacy concerns when placing indoor cameras in bedrooms or other private spaces. Clearly communicate their presence to household members and guests.
- Mounting Options: Indoor cameras can be mounted on walls or ceilings, depending on the desired angle and coverage area.
- Power Source: Ensure easy access to power outlets or consider wireless indoor cameras with rechargeable batteries.
Interior surveillance cameras are almost never resistant to water or weather. It’s never advisable to install an interior camera outside where it may be exposed to moisture or heat.
Outdoor Camera Placement
Outdoor cameras are designed to withstand the elements and monitor the exterior of your home. Here are considerations for their placement:
- Entry and Exit Points: Position outdoor cameras to cover entry and exit points, such as front and back doors, windows, and the garage.
- Yard and Perimeter: Place cameras strategically to monitor your entire yard, garden, and perimeter, minimizing blind spots.
- Weatherproofing: Ensure that outdoor cameras are securely mounted and protected from rain, snow, and extreme temperatures.
- Night Vision: Opt for outdoor cameras with reliable night vision capabilities to maintain surveillance during low-light conditions.
Pay extra attention to your camera waterproof and water-resistant, and weatherproof and weather-resistant features. These four terms do not mean same, therefore make sure you purchase an outdoor cam that can properly withstand weather conditions.
Your choice between indoor and outdoor cameras should align with your specific security needs. Many homeowners opt for a combination of both to achieve comprehensive coverage.
Let’s now delve deeper into specific placements. In the next section, we’ll explore the specific placement considerations for front door security cameras.
4. Front Door Security Camera Placement
Your front door is a primary point of entry and a crucial area to monitor for security. Placing a security camera here can provide valuable insights into who comes to your doorstep and help deter potential intruders. Here are optimal placement strategies for front door security cameras:
- Eye-Level View: Mount the camera at eye level to capture clear images of visitors’ faces. This height typically ranges from 5 to 7 feet above the ground.
- Positioning: Ensure the camera covers the entire front porch and the path leading to the door. Adjust the angle to eliminate blind spots.
- Weather Resistance: Use weatherproof cameras or protective housing to shield the camera from rain, snow, or extreme temperatures.
- Night Vision: Front door cameras should have reliable night vision capabilities to maintain visibility in low-light conditions.
- Two-Way Audio: Consider cameras with two-way audio features to communicate with visitors or delivery personnel remotely.
- Visible or Discreet: Decide whether you want the camera to be visible as a deterrent or discreetly positioned for covert monitoring.
Front door security camera placement not only enhances your home’s security but also provides convenience for monitoring visitors and package deliveries.
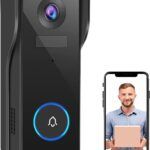
Most or all of these features can be found in typical Doorbell Cameras. These products are specifically designed for front-door surveillance.
Most intruders won’t use your front door, however. This is why in the next section, we’ll explore optimal camera placement for your backyard and garden areas.
5. Backyard and Garden Camera Positioning
Your backyard and garden are often vulnerable areas that require vigilant surveillance. Proper camera placement in these outdoor spaces can deter intruders and provide essential coverage for your property. Here are key tips for positioning cameras in your backyard and garden:
- Comprehensive Coverage: Strategically position cameras to cover the entire backyard, garden, and outdoor spaces. This includes points of entry, patios, and valuable items like outdoor equipment or furniture.
- Elevated Placement: Mount cameras at a height that minimizes tampering and vandalism while maintaining a wide field of view. A height of 9 to 10 feet is often suitable.
- Weatherproofing: Ensure that outdoor cameras are weatherproof to withstand exposure to rain, snow, and varying temperatures.
- Wide-Angle Lenses: Consider cameras with wide-angle lenses to capture more of the outdoor area with a single camera.
- Night Vision: Backyard cameras should have robust night vision capabilities to monitor your outdoor spaces during the night.
- Remote Access: Choose cameras that offer remote access through smartphone apps or web interfaces, allowing you to monitor your backyard and garden from anywhere.
Proper backyard and garden camera positioning is crucial for home security because it provides peace of mind when enjoying outdoor activities or ensuring the safety of pets and children.
Another common point of entry for thieves and intruders is your driveway and garage. Let’s explore essential camera placement tips for your garage and driveway areas.
6. Garage and Driveway Camera Placement Tips
Your garage and driveway are critical areas of your home to monitor, as they often serve as points of entry and exit. Placing cameras in these locations can enhance your overall security. Here are some essential tips for optimal garage and driveway camera placement:
- Driveway Entrance: Install a camera near the entrance of your driveway to capture license plate numbers and vehicle details of incoming and outgoing vehicles.
- Garage Door Coverage: Position a camera to monitor your garage door, a common target for burglars. Ensure it captures the entire door area and any adjacent windows.
- Angle and Height: Mount cameras at a height that provides a clear view of the driveway and garage area. Ensure the angle eliminates blind spots.
- Wireless Connectivity: Consider wireless cameras for remote monitoring of your garage and driveway, especially if you are frequently away from your home.
- Weather Resistance: Ensure outdoor cameras in these locations are weatherproof to withstand exposure to the elements.
- Night Vision: Night vision capabilities are crucial, as these cameras often monitor low-light areas during evening and nighttime.
Proper garage and driveway camera placement helps you keep a watchful eye on all vehicles entering and leaving your property, enhancing overall security and peace of mind.
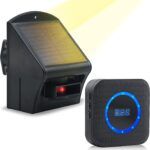
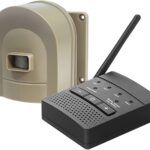
In addition to cameras, consider Driveway Alarms to enhance your driveway security. These motion-detection systems will alert you to any vehicles or people entering their detection range.
In the next section, we’ll discuss how to effectively cover blind spots with corner camera placement.
7. Covering Blind Spots: Corner Camera Placement
One of the challenges in home security camera placement is ensuring that there are no blind spots where intruders can go undetected. Corner camera placement is a strategic solution to address these blind spots effectively. Here’s how to make the most of corner camera placement:
- High and Wide Angle: Position cameras in the upper corners of a room or at an elevated height in outdoor corners. This placement offers a wide field of view and minimizes the risk of tampering.
- Overlapping Coverage: Place corner cameras so that their fields of view overlap, ensuring comprehensive coverage of the area.
- Interior Corners: In indoor spaces, focus on corner placement for cameras that cover valuable areas like living rooms, kitchens, or home offices.
- Exterior Corners: For outdoor areas, use corner camera placement to monitor the corners of your property, where intruders may attempt to gain access.
- Wired vs. Wireless: Consider your wiring options for corner cameras. Wireless cameras may offer more flexibility for corner placements in some cases.
By strategically placing cameras in corners, you can reduce the risk of missing any crucial events or activities in and around your home.
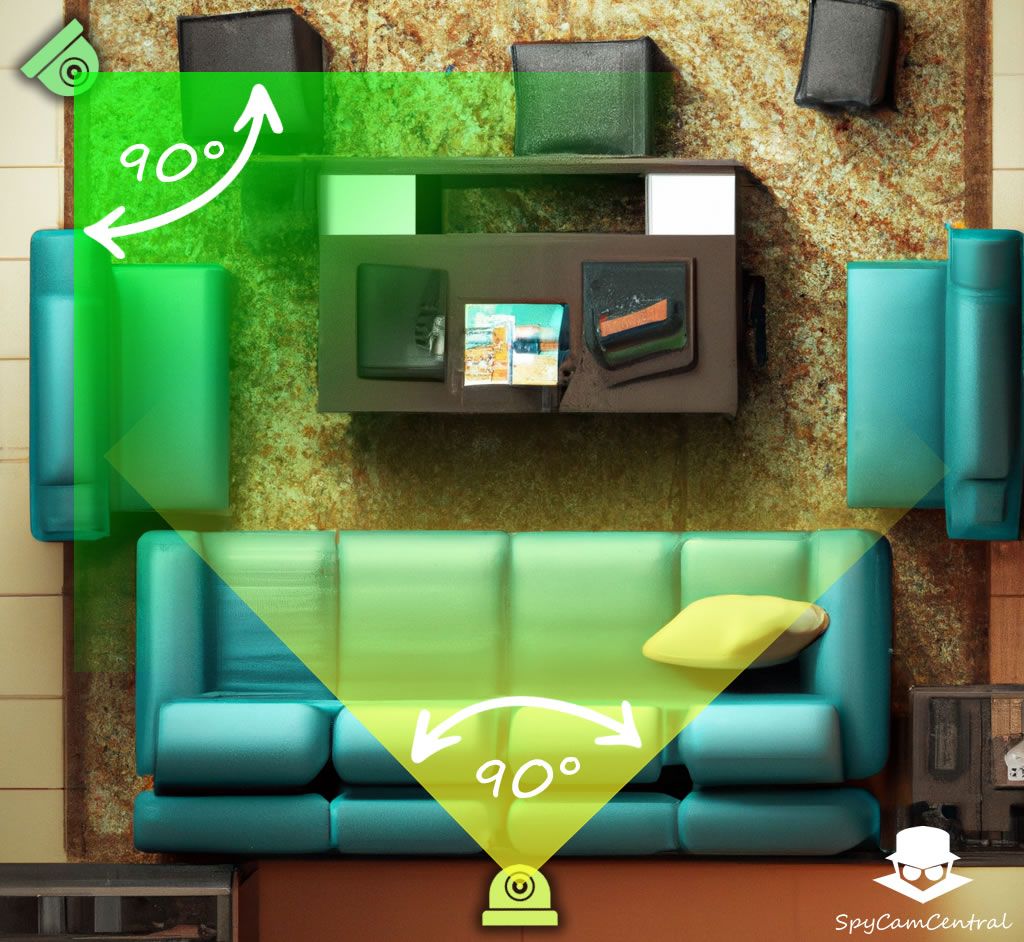
90° lens angle can be enough to cover an entire room when placed correctly.
More about this can be found on our Camera lens angle page, where we discuss fields of view and provide tips and examples on how to best utilize lens angles for maximum coverage.
In the next section, we’ll explore window security camera placement strategies, helping you enhance the security of your home’s vulnerable entry points.
8. Window Security Camera Placement
Windows are potential points of entry for intruders, making them critical areas to monitor with security cameras. Properly placed window cameras can help you detect and deter potential threats. Here are some effective window security camera placement strategies:
- Exterior Window Placement: Install cameras on the exterior of your home to cover windows and capture activities outside. Ensure they are well-protected from the weather.
- Interior Window Placement: Place cameras indoors, facing out through windows, to monitor both the interior and exterior of your home. Be mindful of potential glare or reflections that can affect image quality.
- Strategic Angles: Adjust camera angles to cover the entire window area while minimizing blind spots. Wide-angle lenses may be useful for this purpose.
- Wireless Options: Consider wireless cameras for window placement, as they offer flexibility without the need for extensive wiring.
- Night Vision: Ensure that window cameras have reliable night vision capabilities, as they need to capture images in low-light conditions.
For night vision cameras capturing footage through windows, you must always ensure they do not reflect upon themselves. When using night vision, infrared lights on your camera will constantly trigger motion detection alerts. Make sure the camera is placed at an angle which prevents it from recording its own reflection.
Adequate window security camera placement adds an extra layer of protection to your home, allowing you to monitor potential points of entry.
Now that we went over all outdoor camera placements, we need to explore the placement of surveillance cameras inside your home’s interior rooms.
9. Interior Room Surveillance Camera Placement
Monitoring the interior of your home is equally important as securing its exterior. Interior room surveillance cameras play a key role in keeping your property and loved ones safe. Here are essential tips for placing cameras within your home’s interior:
- Strategic Room Selection: Identify rooms or areas that require surveillance, such as the living room, kitchen, home office, or bedrooms.
- Camera Concealment: Consider discreet placement options to avoid drawing attention. Cameras can be hidden within decorative objects or disguised as everyday items.
- Optimal Viewing Angles: Position cameras to cover the entire room while minimizing blind spots. Corners and high shelves can be effective camera placements.
- Two-Way Audio: Some interior cameras offer two-way audio, allowing you to communicate with family members or pets remotely.
- Privacy Considerations: Be respectful of privacy concerns and communicate the presence of cameras to household members and guests, especially in private spaces.
Interior room surveillance cameras provide peace of mind by allowing you to monitor activities within your home, whether you’re there or away.
Now that we covered all important places to consider mounting a surveillance camera to, let’s take a closer look into common mistakes to avoid when placing security cameras.
10. Common Mistakes in Camera Placement
While strategically placing security cameras can greatly enhance your home’s security, it’s essential to avoid common mistakes that can compromise their effectiveness. Here are some main pitfalls to steer clear of when it comes to camera placement:
- Overlooking Vulnerable Areas: Don’t forget to cover all potential points of entry, both inside and outside your home. Smart intruders will exploit blind spots.
- Improper Height: Avoid mounting cameras too high or too low. Optimal height ensures clear views while deterring tampering.
- Ignoring Lighting Conditions: Consider the lighting conditions in the areas you’re monitoring. Choose cameras with appropriate features like night vision for low-light areas.
- Disregarding Privacy: Be respectful of privacy concerns when placing cameras inside your home. Clearly communicate their presence to household members and guests.
- Visible Wiring: Conceal wiring to prevent tampering or cutting. Wireless cameras can eliminate this issue in many cases.
- Choosing the Wrong Type: Select cameras that match your specific needs. Indoor cameras may not withstand outdoor conditions, and vice versa.
- Forgetting Remote Access: Ensure your cameras offer remote access and consider cloud storage options for easy monitoring and video retrieval.
By avoiding these common mistakes, you can make the most of your security camera system and create a more robust defense for your home.
Another very important factor to consider when placing surveillance cameras are power sources. Let’s explore different power source options for your security cameras and how they impact placement decisions.
11. Power Source Options and Camera Placement
When it comes to powering your home security cameras, you have several options to consider. Your choice of power source can impact where and how you place your cameras. Here are the power source options and how they relate to camera placement:
- Hardwired: Cameras that are hardwired into your home’s electrical system offer a consistent power source. They are typically placed near electrical outlets, which can limit their positioning options.
- Battery-Powered: Battery-powered cameras offer flexibility in placement since they don’t require a nearby power source. However, you’ll need to periodically recharge or replace the batteries.
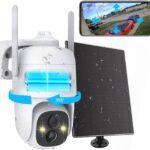
- Solar-Powered: Solar-powered cameras use sunlight to recharge their batteries, providing an eco-friendly and wireless option. Place them in areas with ample sunlight exposure.
- PoE (Power over Ethernet): PoE cameras receive both power and data through an Ethernet cable, allowing for more flexible placement but requiring network connectivity.
- Battery/Solar Combo: Some cameras combine battery and solar power for extended usage without frequent battery changes. They are suitable for outdoor placements with sunlight access.
Your choice of power source should align with your camera placement strategy. Consider the availability of power outlets, exposure to sunlight, and the need for network connectivity when deciding how to power your security cameras. Ideally you want to choose a hardwired camera and simply use an outlet as the most reliable power supply.
Filter our cameras by power source:
Do not miss our comprehensive Hidden camera power sources guide for a more in-depth look into this topic.
12. Wired Camera Placement: Key Downsides
In the following section, we’ll discuss key factors to consider for wired camera placement.
Wired security cameras offer reliability and consistent performance, making them a popular choice for many homeowners. When planning the placement of wired cameras, it’s crucial to consider various factors to maximize their effectiveness. Here are key factors to keep in mind when placing wired security cameras:
- Power Source: Wired cameras require a stable power source, so ensure there’s a nearby electrical outlet or plan for professional installation if needed.
- Wiring Needs: Think about the wiring requirements for your cameras. Proper cable management is essential to prevent tampering and damage.
- Indoor vs. Outdoor: Choose cameras designed for their intended environment. Outdoor cameras should be weatherproof and able to withstand harsh conditions.
- Field of View: Position cameras to cover the desired area effectively. Use wide-angle lenses or multiple cameras to eliminate blind spots.
- Height and Angle: Mount cameras at an optimal height to capture clear images while deterring vandalism. Adjust the angle to eliminate glare or obstructions.
Wired cameras provide a stable and reliable security solution, but they require careful planning to ensure proper placement and functionality.
In the next section, we’ll delve into the pros and cons of using surveillance cameras with wireless networks.
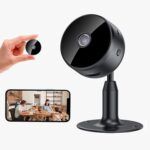
13. Wireless Network Camera Placement: Pros and Cons
Wireless security cameras offer convenience and flexibility in placement, but they come with their own set of advantages and disadvantages. Understanding the pros and cons of wireless camera placement can help you make informed decisions for your home security system:
Wireless camera upsides
- Easy Installation: Wireless cameras are quick and easy to install, as they don’t require extensive wiring.
- Flexible Placement: You can place wireless cameras in various locations without the constraints of wired connections.
- Remote Monitoring: Most wireless cameras offer remote access through smartphone apps or web interfaces, allowing you to monitor your home from anywhere.
- Expandability: You can easily expand your security system by adding more wireless cameras as needed.
- Less Vulnerable to Tampering: With no visible wires, wireless cameras are less vulnerable to tampering or cutting.
Wireless camera downsides
- Signal Interference: Wireless cameras may experience signal interference from other electronic devices or obstacles like walls, potentially affecting video quality or connectivity.
- Battery or Power Dependency: Unless hardwired to a power source, most fully wireless cameras rely on batteries as a power source, which may need frequent replacement or recharging. Solar powered cameras can be a good alternative.
- Limited Range: The range of wireless cameras may be limited, especially for outdoor placements, requiring careful consideration of signal strength and coverage.
- Security Concerns: Wireless networks can be susceptible to hacking if not adequately secured, potentially compromising your camera feeds.
For most uses a wireless Wi-Fi networked camera hardwired to an AC outlet is the best option, as a reliable and continuous power source is important for continuous 24/7 surveillance.
Note: don’t confuse wired/wireless power sources with wireless networks. A camera can have a wired power source, but still transmit footage through Wi-Fi or Bluetooth.
See our Power Sources page for a more comprehensive overview and tips on choosing the right camera power source for your needs.
Wireless network options & comparison
When it comes to choosing a wireless network, your choices are between Wi-Fi, Bluetooth, and Cellular networks.
Wi-Fi cameras
- Connectivity: Wi-Fi is a widely used wireless network option for surveillance cameras.
- Range: Offers coverage within the typical range of a Wi-Fi network, making it suitable for indoor and close-range outdoor monitoring.
- Data Transfer: Provides high data transfer speeds, allowing for real-time video streaming and remote access.
- Common Use: Ideal for home security systems, small businesses, and locations with existing Wi-Fi infrastructure.
Majority of wireless cameras come with Wi-Fi. This is the most convenient way to connect to a camera and remotely view video footage.
Bluetooth cameras
- Connectivity: Bluetooth is less common for surveillance cameras but can be used for short-range connections.
- Range: Limited to a short range, usually up to 30 feet (10 meters), making it suitable for close-range monitoring.
- Data Transfer: Offers lower data transfer speeds compared to Wi-Fi, suitable for simple data transfer or setup.
- Common Use: Less common for surveillance cameras but can be used for short-range connections to mobile devices or accessories.
Bluetooth cameras are less common, and typically used for short-range surveillance. Bluetooth is overall considered more secure than Wi-Fi because the data is transmitted locally, and devices do not need to be connected to the internet.
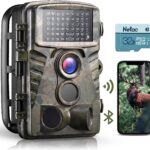
Cellular network cameras
- Connectivity: Cellular networks provide broader coverage, allowing surveillance cameras to connect in remote locations without Wi-Fi access.
- Range: Offers coverage over a wide geographic area, making it suitable for remote or outdoor surveillance.
- Data Transfer: Provides varying data speeds, with 4G and 5G networks offering high-speed internet access for remote monitoring.
- Common Use: Used for surveillance in remote areas, construction sites, and outdoor locations where Wi-Fi is unavailable.
Surveillance cameras using cellular networks are rare. This feature is typically used on Trail cameras.
Browse Cellular Network Cameras
Before opting for a wireless camera, evaluate your specific needs and the potential challenges associated with signal interference and internet availability.
Next up we’re going to delve into night vision camera placement for areas with low-light conditions.
14. Night Vision Camera Placement for Low-Light Areas
Night vision cameras are essential for monitoring areas with low-light conditions or during nighttime. Proper placement of these cameras ensures you capture clear and detailed footage even in the dark. Here’s how to strategically position night vision cameras:
- Entry Points: Place night vision cameras near front and back doors, as well as other potential entry points like side doors and basement windows.
- Perimeter Coverage: Position night vision cameras along the perimeter of your property to monitor the entire area and detect any suspicious activity.
- Pathways and Walkways: Illuminate pathways, walkways, and driveways to ensure safe navigation and security during the night. Additional light sources will help any night vision camera capture clearer footage.
- Strategic Angles: Adjust camera angles to minimize glare or reflections, which can affect night vision capabilities.
- IR Range: Understand the infrared (IR) range of your night vision cameras and ensure they cover the desired distance effectively.
- Indoor Placement: Consider placing night vision cameras indoors to monitor low-light areas such as hallways, basements, or dimly lit rooms.
Night vision camera placement enhances your home’s security by providing 24/7 monitoring capabilities. And because constant round-the-clock surveillance is important, we now need to explore how to set up camera placement for remote monitoring, allowing you to keep an eye on your property from anywhere.
15. Camera Placement for Remote Monitoring
Remote monitoring of your security cameras allows you to keep a watchful eye on your property, whether you’re at home or miles away. Proper camera placement is essential to ensure effective remote access. Here’s how to set up your cameras for remote monitoring:
- Internet Connection: Ensure your home has a reliable and high-speed internet connection to support remote access to your cameras.
- Smartphone Apps: Most modern security cameras come with smartphone apps that provide real-time access to camera feeds. Install these apps on your mobile devices.
- Camera Positioning: Position cameras strategically to cover critical areas you want to monitor remotely, such as entry points, the backyard, or the garage.
- Network Security: Secure your home network with strong passwords and encryption to prevent unauthorized access to your camera feeds.
- Cloud Storage: Consider using cloud storage services offered by camera manufacturers to store and access recorded footage remotely.
- Camera Compatibility: Ensure that your cameras are compatible with the remote monitoring operating system or software you plan to use.
With the right camera placement and technology, you can have peace of mind knowing that you can monitor your home remotely, making your security system more effective.
In the next section, we’ll explore the dilemma of visible versus hidden camera placement.
16. Hidden vs. Visible Camera Dilemma
One critical decision when it comes to home security camera placement is whether to make your cameras visible or to conceal them. Both options have their advantages and drawbacks, and your choice may depend on your security goals and preferences.
Let’s explore the pros and cons of hidden cameras versus regular visible surveillance cameras:
Visible cameras:
- Deterrence: Visible cameras act as a deterrent to potential intruders. The presence of cameras can discourage criminal activity around your property.
- Transparency: Making cameras visible sends a clear message that you prioritize security, which can reassure family members and visitors.
- Legal Compliance: In some areas, there are laws requiring homeowners to make their security cameras visible to protect privacy rights.
Hidden cameras:
- Covert Surveillance: Hidden cameras allow for discreet monitoring, which can be useful for capturing evidence in cases of vandalism or theft.
- Avoid Tampering: Concealed cameras are less vulnerable to tampering or attempts to disable them by intruders.
- Privacy Concerns: Hidden cameras address privacy concerns, as they are not as intrusive to neighbors or passersby.
Your decision should be based on your specific security needs and local regulations. In many cases, a combination of both visible and hidden cameras may provide the best overall security coverage.
A hidden camera is generally more secure due to the fact it’s difficult to even notice it. But, even a regular surveillance camera can be secured from tampering with a few easy measures.
17. Securing Your Security Camera: Anti-Tampering Measures
Ensuring the integrity and functionality of your home surveillance cameras is paramount to maintaining your home’s security. Anti-tampering measures can help prevent unauthorized access, vandalism, or disabling of your cams. Here are some essential tips to secure your security cameras:
- Tamper-Resistant Housing: Invest in security cameras with tamper-resistant housing, which makes it difficult for intruders to physically damage or disable the camera.
- Lockable Mounts: Use lockable mounts or brackets to secure your cameras in place, preventing them from being easily repositioned or removed.
- Hidden Wiring: Conceal camera wiring to prevent tampering. Intruders may attempt to cut or disconnect wires to disable cameras, so hiding them can add an extra layer of protection.
- Secure Network: Protect your camera’s network connection with strong passwords and encryption to prevent unauthorized access to camera feeds.
- Remote Access Controls: Ensure that only authorized individuals have access to your camera’s remote monitoring controls and settings.
- Regular Inspections: Periodically inspect your cameras for signs of tampering or damage, and promptly address any issues that arise.
By implementing these basic anti-tampering measures, you can help safeguard your security cameras and maintain their effectiveness in protecting your home.
For optimal performance, securing your surveillance camera is equally important to doing regular maintenance.
18. Regular Maintenance for Optimal Camera Performance
Maintaining your home security cameras is essential to ensure they function at their best and continue to provide reliable surveillance. Regular maintenance can extend the lifespan of your cameras and help you avoid costly replacements. Here are some key maintenance tasks to perform:
- Camera Cleaning: Periodically clean the camera lenses and housings to remove dirt, dust, and debris that can affect image quality.
- Check for Damage: Inspect your cameras for any physical damage, loose components, or signs of wear and tear.
- Update Firmware: Keep camera firmware up to date with the latest manufacturer updates and security patches to protect against vulnerabilities.
- Test Camera Functionality: Regularly test your cameras by reviewing recorded footage and checking for any issues with live streaming or remote access.
- Verify Power Sources: If your cameras are battery-powered or solar-powered, ensure that the power sources are functioning correctly, and replace batteries as needed.
- Review Storage: Check the available storage space on your recording devices or cloud storage accounts. Delete old footage if necessary, or use loop recording feature to free up space.
By performing these routine maintenance tasks, you can maintain the optimal performance of your security cameras and have peace of mind knowing that your home is well-protected.
Conclusion: Maximizing Home Security Through Strategic Camera Placement
In this comprehensive guide, we’ve delved into the art and science of home security camera placement, equipping you with the knowledge and strategies to bolster the safety of your home. By carefully considering where and how you position your security cameras, you can create a robust defense against potential threats and gain valuable peace of mind.
Whether you’re safeguarding your front door, monitoring your backyard, or protecting the interior of your home, thoughtful planning is the foundation of effective camera placement. Understanding topics such as optimal camera height, indoor versus outdoor placement, and considerations for low-light conditions, ensures you have a comprehensive toolkit to make informed decisions about camera placement that suits your specific circumstances.
Remember that every home is unique. Tailor your camera placement to address your specific security concerns, and don’t hesitate to consult with professionals if needed.
By implementing the tips and tricks outlined in this guide, you’re well on your way to creating a safer and more secure home environment. Your investment in strategic camera placement is an investment in the safety and well-being of your loved ones and your peace of mind.